
All your chats in one app - Self-host Matrix with Bridges and Cloudflare
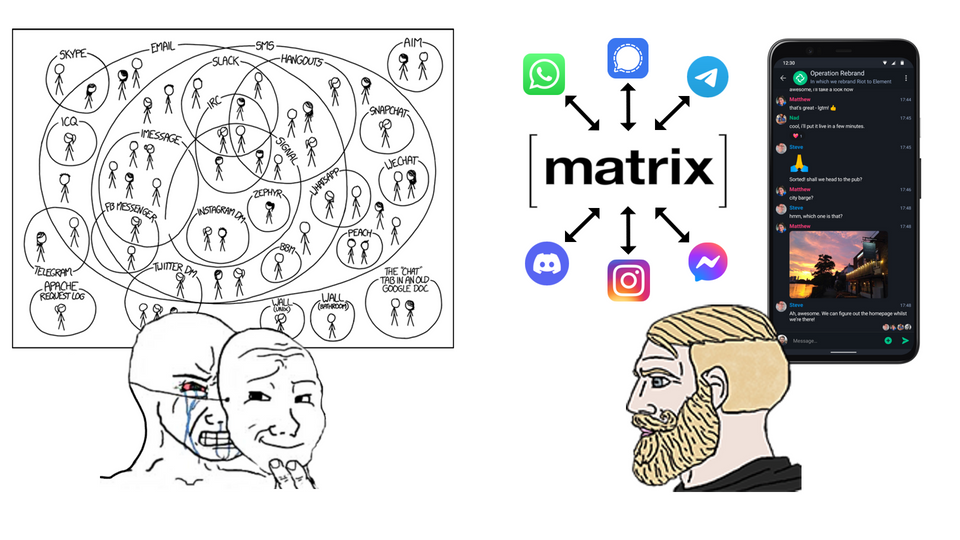
Do your chats look like this? Do you always forget which contacts use which apps? Do you wish there was a way to have all your chats in just one place?
If you answered yes to any of those question: good news! In the following guide I'm going to show you how to use Matrix to achieve your dream of an all-in-one chat app, by using Matrix "bridges" (more on that later) and securing the connection with Cloudflare Tunnels.
Matrix
The Matrix protocol can communicate with other apps through "bridges", and this allows us to use a Matrix compatible app to chat with everyone else across every other app.
Self-hosting a Matrix server isn't exactly known for being a walk in the park. This guide is aimed towards intermediate and advanced self-hosters. However we will self-host it using the matrix-docker-ansible-deploy playbook on Github, which makes the installation and the maintenance much easier - so don't fret! I will break things down as best as I can, so hopefully it will be as easy as stealing candy from a baby (don't do that!).
Bridges
But what even is a Matrix bridge?
Simply put, it's a connection between Matrix and other platforms that allows Matrix to exchange messages and other data with them.
For example, by using a Whatsapp bridge, you would be able to chat with your contacts using your Whatsapp account, but on a Matrix supported app instead. That means your contacts wouldn't be able to tell the difference, as they are still texting you at your usual Whatsapp account inside the official app.
Below you can find more info about which ones are available and what chat features they currently support (and their possible limitations).
 Bridges
The setup
In this guide I will show you how to self-host your own secure Matrix server using an Ansible Playbook, that we will first configure on a local machine, and then deploy on our server through an SSH connection.
We will use Cloudflare Tunnels to setup the Matrix subdomains and to protect our SSH connection.
You will be able to select which bridges you want to install, and we will add federation support to be able to interact with users from other Matrix servers.
I will also show you how to implement the latest bleeding-edge Sliding sync proxy, which allows for a faster than ever messaging experience.
Ansible Playbooks
"Ansible Playbooks offer a repeatable, re-usable, simple configuration management and multi-machine deployment system, one that is well suited to deploying complex applications. If you need to execute a task with Ansible more than once, write a playbook and put it under source control. Then you can use the playbook to push out new configuration or confirm the configuration of remote systems."
Federation
"Federation is the process by which users on different servers can participate in the same room. For this to work, those other servers must be able to contact yours to send messages."
Requirements
- A domain
- A Cloudflare account (free tier)
- A local computer and a server* (I recommend at least 2GB of ram** and 50gb of disk space)
*preferably both running Linux. This guide will assume they are, but you can adapt the commands to other OS's.
**memory usage increases the more bridges you activate.
Remember to change <example.com> with your own domain wherever it appears in this guide.
Ssh setup
For this guide I'm assuming you already have your main domain added to Cloudflare.
Create a new Tunnel in the Zero Trust dashboard and install the cloudflared connector in your server as shown in the Overview.
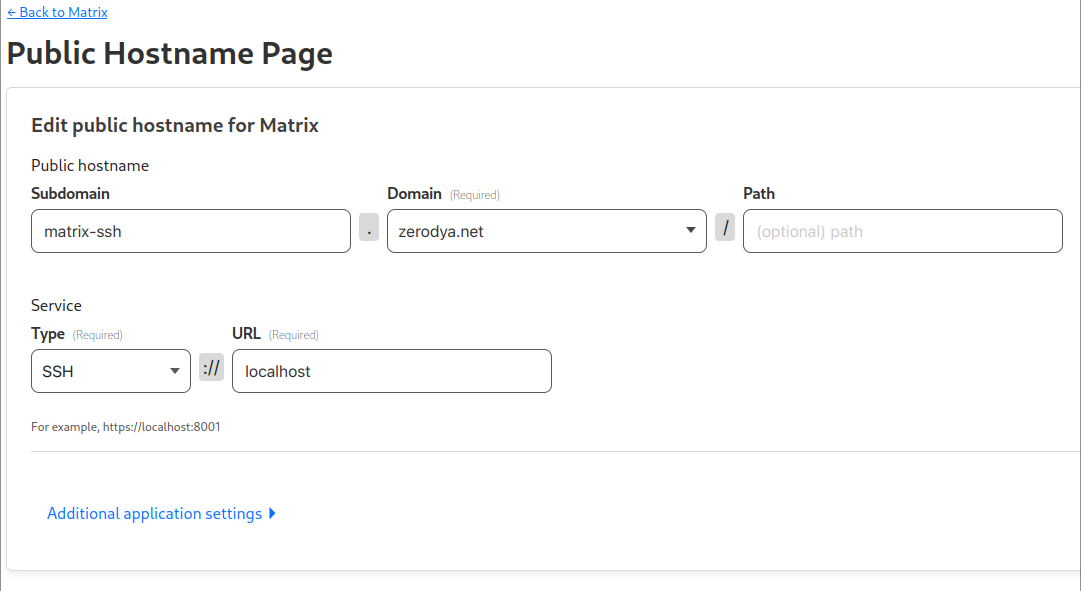
We are now going to add a new public hostname. We'll name it matrix-ssh.<example.com>, and we will point it to localhost using the SSH service type.
Next up is a very important step, but how you configure it is up to you. Take some time to create a Cloudflare Access Application, and protect its access with an authentication method - I recommend a One-time PIN.
When you're happy with that, install cloudflared on your local computer too.
Edit ~/.ssh/config on your local computer (or create it) and paste the block below, but change the domain as well as the path where cloudflared is installed if different:
Host matrix-ssh.<example.com>
    ProxyCommand /usr/bin/cloudflared access ssh --hostname %h
.ssh/config
If everything went well, you should be able to ssh into your server with ssh root@matrix-ssh.<example.com>, and Cloudflare should open your browser to authenticate you based on how you setup the Access Application earlier.
Now all the ssh traffic to your server will be going securely through Cloudflare - congratulations!! You are free to block open SSH ports in your firewall.
Key-based auth
Now that we can ssh into our server through Cloudflare, we are going to do that without the need to use a password. Let's implement a key-based authentication!
If you haven't already, generate a ssh key pair on your local computer:
ssh-keygenContinue with the defaults. The keys will be stored in ~/.ssh. The private key will be called id_rsa and the associated public key will be called id_rsa.pub.
Copy your public key over to your server:
ssh-copy-id -i ~/.ssh/id_rsa.pub root@matrix-ssh.<example.com>Now you should be able to ssh into your server without being asked for the password:
ssh root@matrix-ssh.<example.com>Configure the Playbook
On your local computer. clone the matrix-docker-ansible-deploy Github repository, and move inside it:
git clone https://github.com/spantaleev/matrix-docker-ansible-deploy.git
cd matrix-docker-ansible-deploy
This is the directory from where we will configure our playbook - and also upgrade it in the future - before deploying it on the server.
Before proceeding, install ansible, just and pwgen on your local computer, which you will need later.
Hosts
Create the file hosts inside the inventory directory, and copy the following content:
[matrix_servers]
matrix.<example.com> ansible_host=matrix-ssh.<example.com>

[matrix_servers:vars]
ansible_ssh_user=root
ansible_ssh_private_key_file='~/.ssh/id_rsa'
ansible_ssh_common_args='-o ProxyCommand="/usr/bin/cloudflared access ssh --hostname %h" '
matrix-docker-ansible-deploy/inventory/hosts
- Insert your domain instead of
<example.com> - Change
~/.ssh/id_rsaif you're using a different key or path - Change path of
/usr/bin/cloudflaredif you installed it somewhere else
When you're done, test the connection to the server using Ansible on your local computer:
ansible -i inventory/hosts all -m ping -vVariables
Create the directory inventory/host_vars/matrix.<example.com>:
mkdir inventory/host_vars/matrix.<example.com>We are now going to add a new file called vars.yml inside that directory.
We will use the file below, which is based on Beeper's vars.yml and adjusted to make it work with Cloudflare Tunnels.
---
    # The bare domain name which represents your Matrix identity.
    # Matrix user ids for your server will be of the form (`@user:<matrix-domain>`).
    #
    # Note: this playbook does not touch the server referenced here.
    # Installation happens on another server ("matrix.<matrix-domain>").
    #
    # If you've deployed using the wrong domain, you'll have to run the Uninstalling step,
    # because you can't change the Domain after deployment.
    #
    # Example value: example.com
    matrix_domain: <insert_domain>

    # The Matrix homeserver software to install.
    # See:
    #  - `roles/custom/matrix-base/defaults/main.yml` for valid options
    # - the `docs/configuring-playbook-IMPLEMENTATION_NAME.md` documentation page, if one is available for your implementation choice
    matrix_homeserver_implementation: synapse

    # A secret used as a base, for generating various other secrets.
    # You can put any string here, but generating a strong one is preferred (e.g. `pwgen -s 64 1`).
    matrix_homeserver_generic_secret_key: '<create_secretkey>'

    # Specify reverse proxy
    matrix_playbook_reverse_proxy_type: playbook-managed-traefik

    # Disable the web-secure (port 443) endpoint, which also disables SSL certificate retrieval
    devture_traefik_config_entrypoint_web_secure_enabled: false

    devture_traefik_container_web_host_bind_port: "127.0.0.1:81"
    devture_traefik_config_entrypoint_web_forwardedHeaders_insecure: true
    devture_traefik_additional_entrypoints_auto:
      - name: matrix-federation
        port: 8449
        host_bind_port: "127.0.0.1:8449"
        config: {}

    # Disable integrated Coturn server
    matrix_coturn_enabled: false

    # Disable installing Element
    matrix_client_element_enabled: false

    matrix_playbook_docker_installation_enabled: false

    # A Postgres password to use for the superuser Postgres user (called `matrix` by default).
    #
    # The playbook creates additional Postgres users and databases (one for each enabled service)
    # using this superuser account.
    devture_postgres_connection_password: '<create_secretkey>'

    matrix_synapse_ext_password_provider_shared_secret_auth_enabled: true
    # matrix_synapse_ext_password_provider_shared_secret_auth_shared_secret: YOUR_SHARED_SECRET_GOES_HERE
    matrix_synapse_ext_password_provider_shared_secret_auth_shared_secret: <create_secretkey>

    # Discord
    matrix_mautrix_discord_enabled: false

    # Telegram
    # You'll need to obtain API keys from https://my.telegram.org/apps and then enter the details below
    matrix_mautrix_telegram_enabled: false
    matrix_mautrix_telegram_api_id: YOUR_TELEGRAM_API_ID
    matrix_mautrix_telegram_api_hash: YOUR_TELEGRAM_API_HASH

    # WhatsApp
    matrix_mautrix_whatsapp_enabled: false
    matrix_synapse_configuration_extension_yaml: |
      experimental_features:
        msc2716_enabled: true
    matrix_mautrix_whatsapp_configuration_extension_yaml:
      bridge:
        history_sync:
          backfill: true

    # Facebook Messenger
    matrix_mautrix_facebook_enabled: false

    # Google Chat
    matrix_mautrix_googlechat_enabled: false

    # Instagram
    matrix_mautrix_instagram_enabled: false

    # Twitter
    matrix_mautrix_twitter_enabled: false

    # Signal
    matrix_mautrix_signal_enabled: false

    # Linkedin
    matrix_beeper_linkedin_enabled: false

    # IRC
    matrix_heisenbridge_enabled: false
matrix-docker-ansible-deploy/inventory/host_vars/matrix.<example.com>/vars.yml
- Insert your domain instead of
<insert_domain> - Wherever
<create_secretkey>shows up, runpwgen -s 64 1and insert the generated key - Enable the bridges you want to use by changing their value from
falsetotrue
The bridges in the file above aren't all of the available ones. Here is the full list of bridges provided by matrix-docker-ansible-deploy on Github.
Note that I have disabled TURN with matrix_coturn_enabled: false because I won't be using voice/video calls. Enabling it is possible, but you’d have to expose your server from outside of Cloudflare.
Installation
Once you're happy with the configuration, you're ready to finally deploy your installation to the server!
On your local computer, inside the matrix-docker-ansible-deploy directory, run:
just setup-allThis will take a while. In the meantime you can already proceed to the next step.
Hostnames
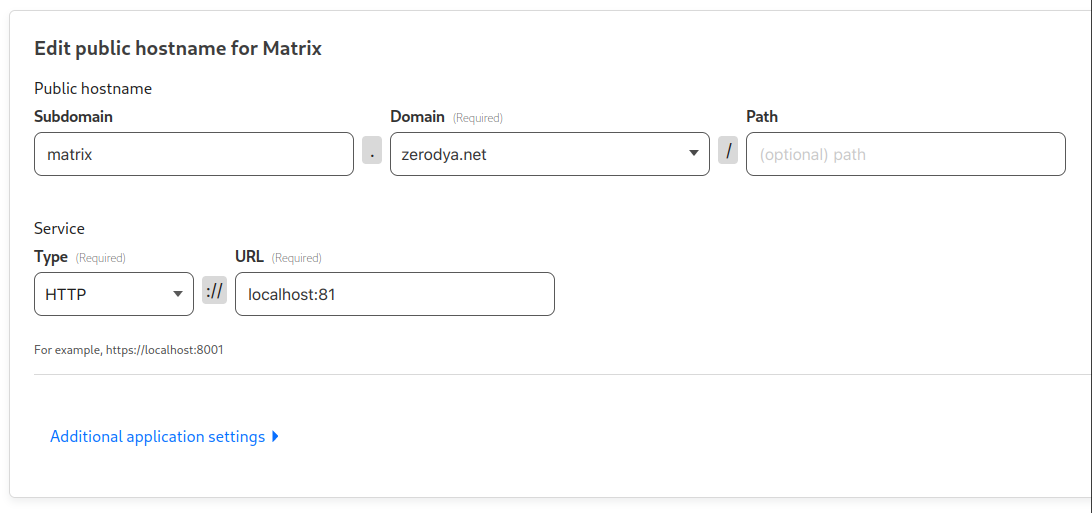
We are going to expose the Matrix Client (local port 81) and the Matrix Server (local port 8449) services through Cloudflare Tunnels. However, since each hostname can only point to a single service, we’ll trick the Matrix Server into thinking that it is running on the same hostname as the Matrix Client.
Create a matrix.<example.com> hostname for the Matrix Client and point it to http://localhost:81
Create a matrix-fed.<example.com> hostname for the Matrix Server and point it to http://localhost:8449, with HTTP Host Header matrix.<example.com>
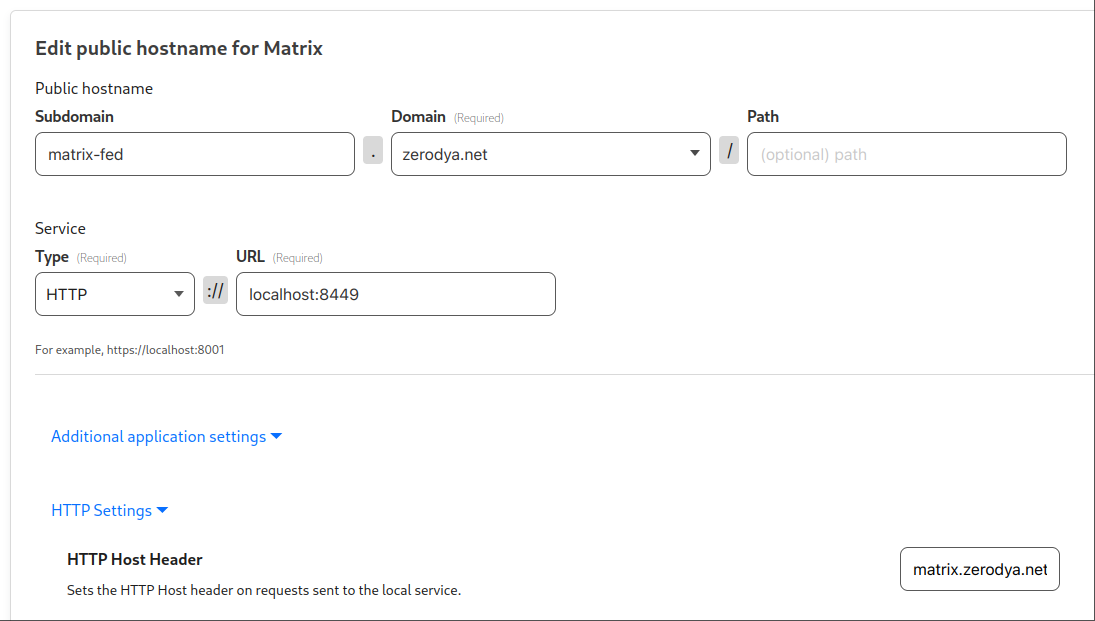
By overriding the HTTP Host Header, when a server connects to matrix-fed.example.com, our Matrix Server will be served matrix.example.com.
Account creation
When the installation finishes, you can proceed to create your account by running the following command on your local computer, with your username (<insert_username) and password (<your_password>) of choice.
ansible-playbook -i inventory/hosts setup.yml --extra-vars='username=<insert_username> password=<your_password> admin=yes' --tags=register-userAt long last, your Matrix server is finally ready (well almost, but it works already).
Go ahead and test it by logging in to a Matrix client, for example:
- In a browser, open https://app.schildi.chat/#/login
- Click Edit and insert
https://matrix.<example.com>, then click Continue - Sign in with your username and password created above
Federation
We have created matrix-fed.<example.com>, but now we need a way to tell other servers to connect to it. As stated in the Matrix Specification, We need to implement server discovery by adding two well-known files at the root of our main domain.
If you already have a way to serve files on your main domain, these are the two files you need to add (otherwise, skip to the next step):
At https://<example.com>/.well-known/matrix/client:
{
  "m.homeserver": {
    "base_url": "https://matrix.<example.com>"
  },
  "m.identity_server": {
    "base_url": "https://vector.im"
  }
}
.well-known/matrix/client
At https://<example.com>/.well-known/matrix/server:
{ "m.server": "matrix-fed.<example.com>:8443" }.well-known/matrix/server
Change <example.com> with your own domain.
Cloudflare Workers
If you already have an application running on your main domain, and can't serve files there, you can use Cloudflare Workers with custom routes to dynamically reply to those requests.
Go to Workers Routes in your Cloudflare Dashboard, and click the Manage Workers button.
Then 'Create Application', 'Create Worker' and 'Deploy' the default script which we will edit soon.
Go back to your applications and click on the one we just created, then click 'Quick Edit'.
Paste the following script provided by this blogpost, and insert your domain in the 1st and 3rd line:
const HOMESERVER_URL = "https://matrix.<example.com>";
const IDENTITY_SERVER_URL = "https://vector.im";
const FEDERATION_SERVER = "matrix-fed.<example.com>:8443";

export default {
  async fetch(request, env) {
    const path = new URL(request.url).pathname;
    switch (path) {
      case "/.well-known/matrix/client":
        return new Response(
          `{"m.homeserver": {"base_url": "${HOMESERVER_URL}"},"m.identity_server": {"base_url": "${IDENTITY_SERVER_URL}"}}`
        );
      case "/.well-known/matrix/server":
        return new Response(`{"m.server": "${FEDERATION_SERVER}"}`);
      default:
        return new Response("Invalid request");
    }
  },
};
worker.js
Rename the application to something like matrix-well-known.
Then in the 'Triggers' tab of your application, scroll down to the 'Routes' section. Click on 'Add route' and insert <example.com>/.well-known/matrix/* like this:
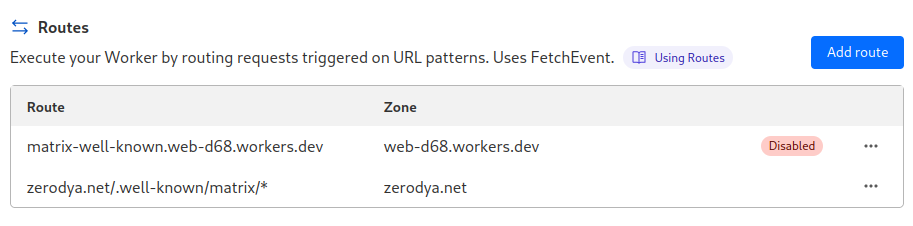
You're free to disable the default worker route.
Once you're done, verify that the well-known files are available in their respective path of your domain, and test if the server is correctly federated using Matrix Federation Tester your main domain.
If everything went smoothly... congratulations! You can now find and chat with other Matrix users, as well as join rooms on different servers. Feel free to send me a message to celebrate.
Bridges
Now to enable the bridges you installed:
- Inside your Matrix client, find and add each bridge bot to your rooms by going to Direct Messages and starting a conversation with them (e.g. for Whatsapp start a new conversation with @whatsappbot:<example.com>)
- Send a
helpmessage to the bot, and you will be shown a list of commands to login (usuallyloginorlogin-qr) and perform other actions.

You can find the bots names in their respective documentation in this list
Sliding sync (Optional)
Sliding sync is the latest Matrix proxy which allows to sync messages even faster. It is currently still experimental and it requires a client that supports it.
As of now, the options to take advantage of Sliding sync are either by using a web client which supports it as a Labs option. or by using the Element X app which is currently being actively developed and far from being feature complete. Read the official blog post.
As you can see it's still very much in its early stages and you probably won't be seeing its benefits soon. However it's super simple to implement and it's worth to already have it for the future.
First, edit matrix-docker-ansible-deploy/inventory/host_vars/matrix.<example.com>/vars.yml on your local computer, and add the following variable:
matrix_sliding_sync_enabled: trueThen edit the well-known file at https://<example.com>/.well-known/matrix/client to the following:
{
  "m.homeserver": {
    "base_url": "https://matrix.<example.com>"
  },
  "m.identity_server": {
    "base_url": "https://vector.im"
  },
  "org.matrix.msc3575.proxy": {
    "url": "https://matrix.<example.com>/sliding-sync"
  }
}
or alternatively, if you used Cloudflare Workers:
const HOMESERVER_URL = "https://matrix.<example.com>";
const IDENTITY_SERVER_URL = "https://vector.im";
const FEDERATION_SERVER = "matrix-fed.<example.com>:8443";

export default {
  async fetch(request, env) {
    const path = new URL(request.url).pathname;
    switch (path) {
      case "/.well-known/matrix/client":
        return new Response(
          `{"m.homeserver": {"base_url": "${HOMESERVER_URL}"},"m.identity_server": {"base_url": "${IDENTITY_SERVER_URL}"},"org.matrix.msc3575.proxy": {"url": "${HOMESERVER_URL}/sliding-sync"}}`
        );
      case "/.well-known/matrix/server":
        return new Response(`{"m.server": "${FEDERATION_SERVER}"}`);
      default:
        return new Response("Invalid request");
    }
  },
};
worker.js
As always, change <example.com> with your own domain.
When you're done, just re-run the installation again (just setup-all) and your Sliding sync proxy will be available at the https://matrix.<example.com>/sliding-sync URL.
To test it, just try to login using the Element X app or by inserting the proxy URL above in the Sliding sync Labs option of a compatible web client.
Updating
To upgrade services in the future, inside your matrix-docker-ansible-deploy directory, run:
git pull #update files from the git repo

just setup-all #restart the services
It's a good idea to take a look at the changelog to see if there have been any backward-incompatible changes that you need to take care of.
If you want to be notified when new versions of Synapse are released, you can join the Synapse Homeowners room: #homeowners:matrix.org.
Special thanks:
matrix-docker-ansible-deploy - for the Ansible playbook
Beeper self-host - for the vars.yml template
Appelman's blog post - for how to setup federation with Cloudflare Workers